

This is my take on making a homemade grappling dummy. My goal was to create something durable, flexible, and strong, and to try to do it as cheaply as possible. I tried to do this under 50 dollars, but I ended up spending about 80 dollars. This design took a lot of duct tape, which was about half the cost. If you can get *good* duct tape cheaper than I did (about 10 dollars a roll), then you might be able to get the cost down. Regardless, I still saved a ton over buying one outright.
I started the design based on this link on various tutorials I’ve seen online. I combined a couple of ideas and built what I have listed below. I wanted to put together a detailed tutorial on how to build one, because I didn’t see a really well spelled out tutorial online already.
I’ve had some time to practice with this dummy. So far it seems pretty sturdy. I will update this page if there end up being any issues with it. Since this design uses the service cable, the flexibility allows you to position this dummy in a variety of ways, and the strength of the service cable allows the dummy to hold it’s position on it’s own. It can sit in upright in your guard, or wrap you in guard, etc.
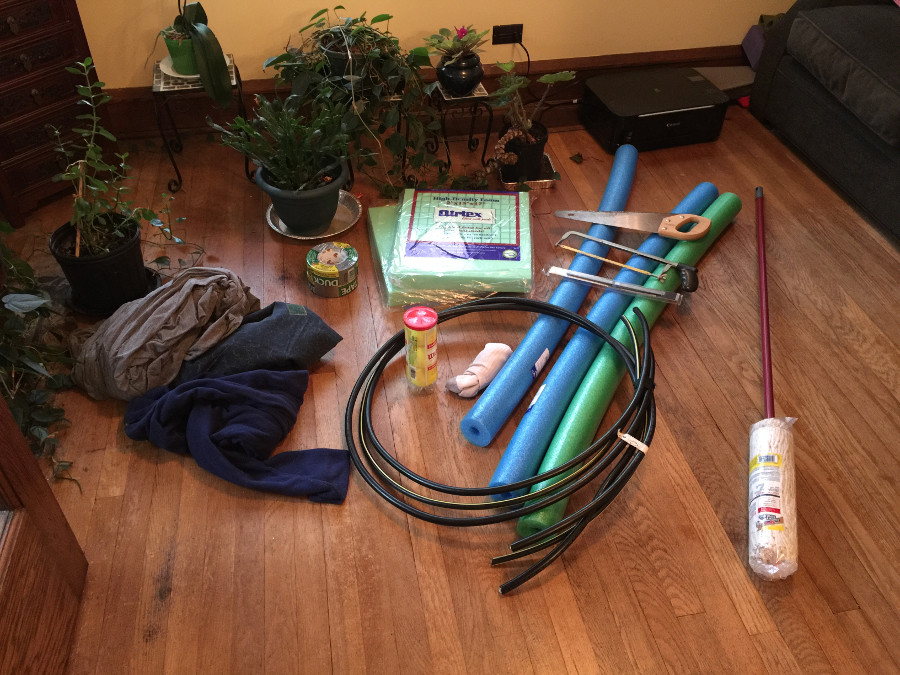
WHAT YOU’LL NEED
- 9 Feet of Service Entrance Cable, Aluminum, 4/0-4/0-2/0 200 Amp “AA8176 style U-type AWG 2” – Can be found at Lowes for about $1.89 a foot as of the time of this article. It comes bundled with 3 cables, the bundle of 3 at 9 feet will cost around 18 dollars total.
I deteremined the measurement of 9 feet for my frame by making the following calculations:- Measure the length of your foot x2 (if you have a 10 inch foot, then double that and make it 20)
- Measure the length of your leg x2 (same for the leg, if you have 36 inch leg, then double it and make it 72)
- Measure the width of your waist (if it’s 15 inches across don’t double this length, just keep it 15)
- Add all the above measurements together 20 + 72 + 17 = 109 inches = approximately 9feet
As you’ll see later in the instructions, the piece of cable that makes up the feet/legs/waist would be the longest length you would need.
- 3 to 4 rolls of Duct Tape. I used a little over 3 rolls, you might be able to do it with a little less. (30 – 40 dollars)
- 2 Tennis Balls – 2 dollars at Target.
- 2 – 2″ x 15″ x 17″ sheets of High Density Foam. Can be found at Jo-Ann Fabrics for around 10 dollars a sheet.
- Some filler material – I used 2 bed sheets and an old thick sweatshirt, all bought from good will for about 5 dollars total.
- 3 Pool noodles – Target, about 4 dollars a piece
- 1 pair of socks.
- A mop, the kind with a hollow steel handle, and the stringy mop head that attaches directly to the handle, not to an piece of plastic between the handle and the head. The “Quickie – Clean Results Wet Mop” is what I used. About 7 dollars at Lowes.
- A knife
- A hacksaw
STEPS TO BUILD YOUR GRAPPLING DUMMY
-
- Start with the right supplies (listed above)

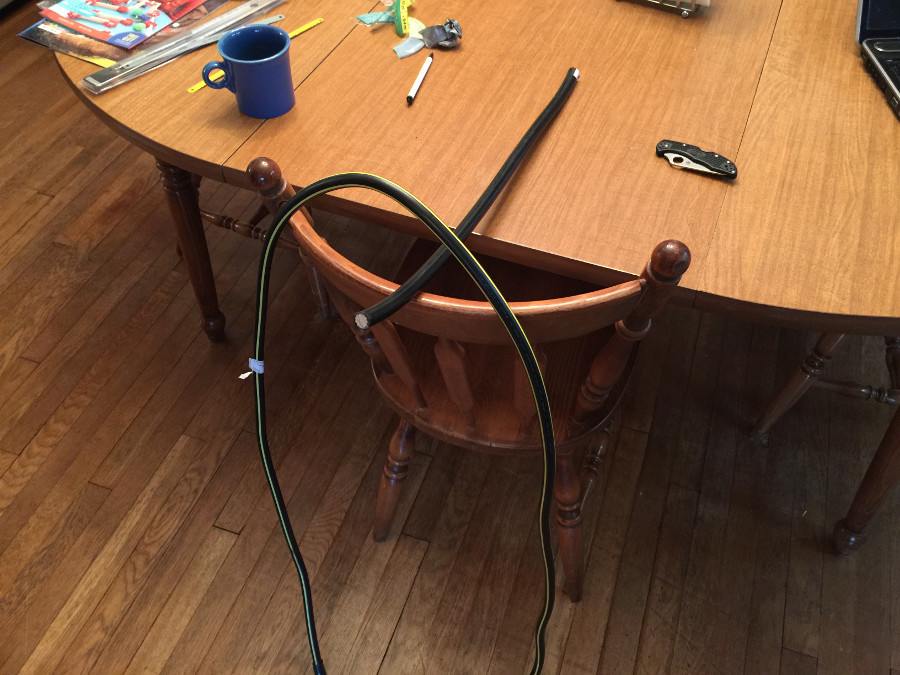
- Each of the pieces of service cable will make up the torso, arms and legs respectively. Begin by measuring your torso piece. I cut mine to be 24 inches long, to simulate the torso of a 6 foot tall person. I measured from my hip to just above my shoulders to get the measurement of 24 inches. This torso piece is essentially mimicing a human spine in this frame.
Next we’ll attach another piece of service cable (without cutting it yet, keep at the original 9 feet in length) to the top of the torso to begin making the frame of the arms.
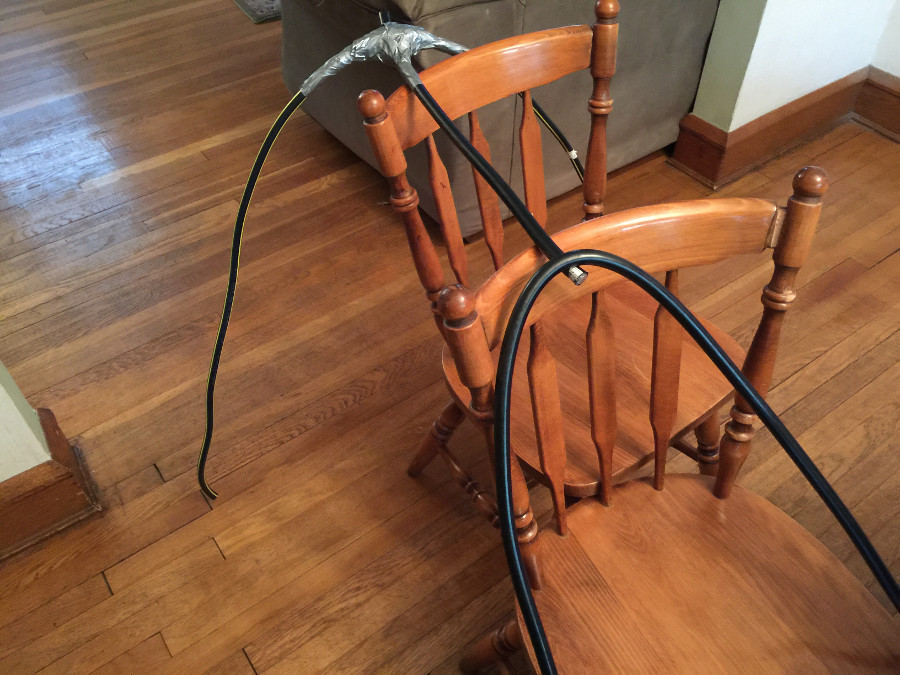
- Using a liberal amount of duct tape, start taping the center of the “arms” service cable to near the top of the torso. I used an x-pattern with the duct tape, and used a lot of it, as I didn’t want this part to come apart. Be sure to leave a an inch or two at the top of the torso (as pictured below), we’ll need that to attach the head down the road.
Here we can see the arms are finished being attached to the torso.
- The next step is to attach the final piece of service cable to the torso to make the frame for the legs. This piece of cable will end up being the longest piece of cable needed for the dummy down the line after all cuts are made.
Attach this last piece of service cable to the bottom of the torso at the center of the “legs”. Do not cut this piece to size yet, leave it at the original 9 feet in length. When you attach the legs attach them at the bottom of the torso,
without leaving any extra torso sticking out (unlike when we attached the arms where we DID want extra torso above the arms, so we could attach the head later).
Use a liberal amount of duct tape and the same x-pattern that was used with making the arms to secure the legs to the torso.
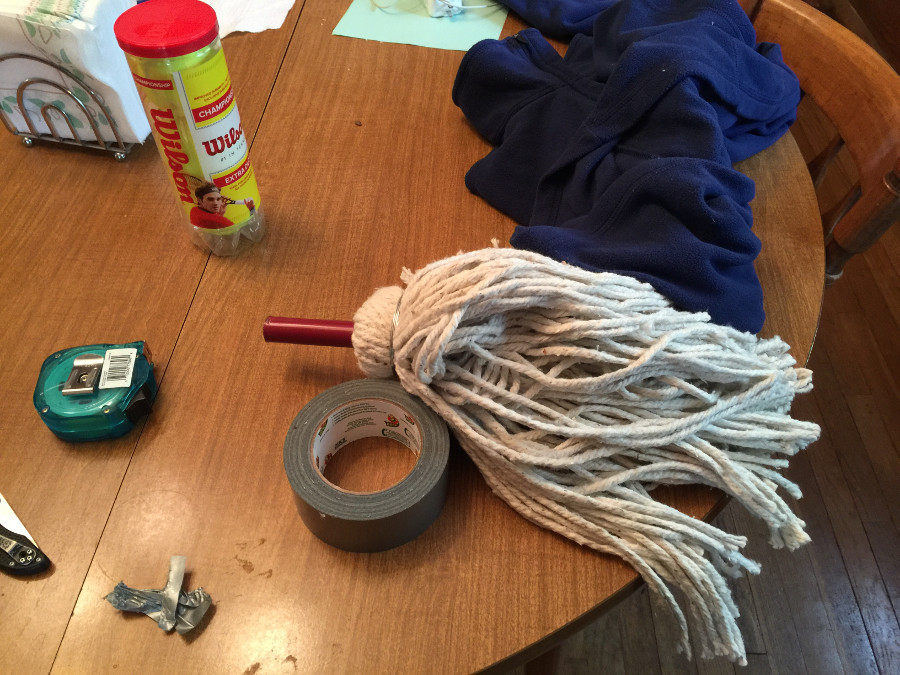
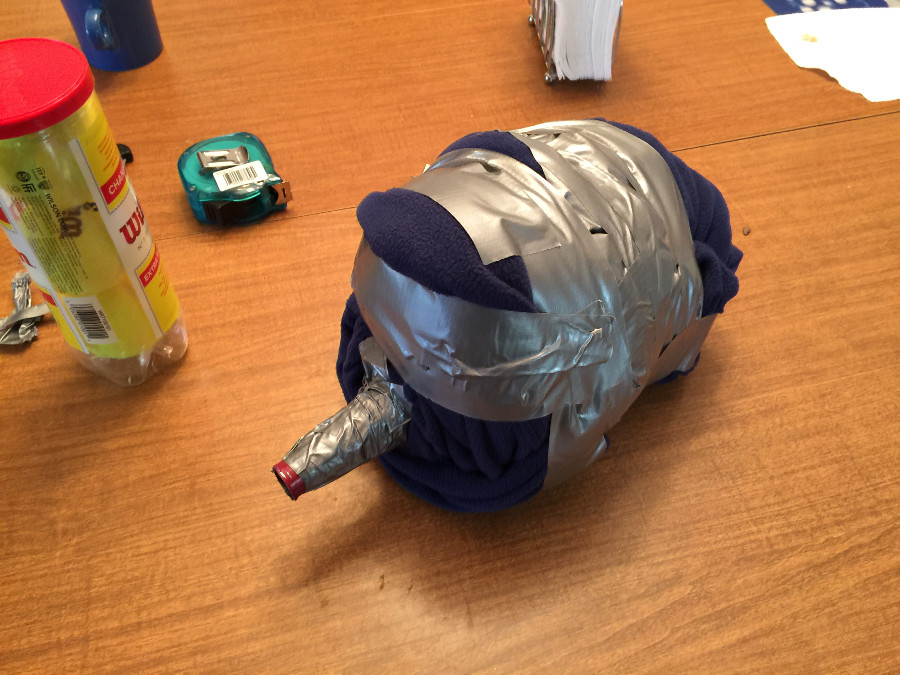
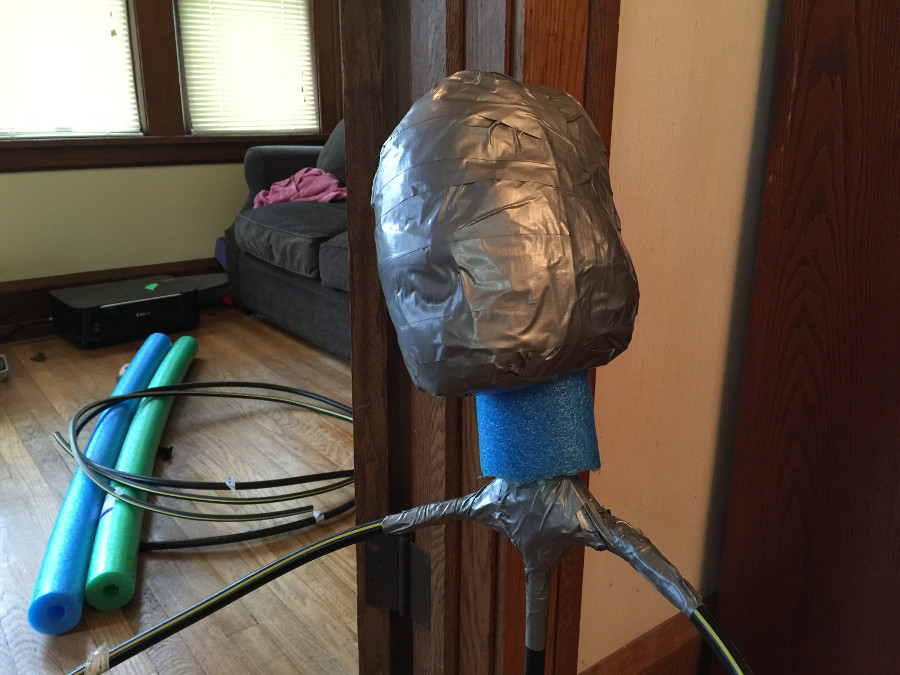
- Next, we’ll construct the head. Using the hacksaw, saw the top of the mop, leaving 3 inches of handle for the neck.
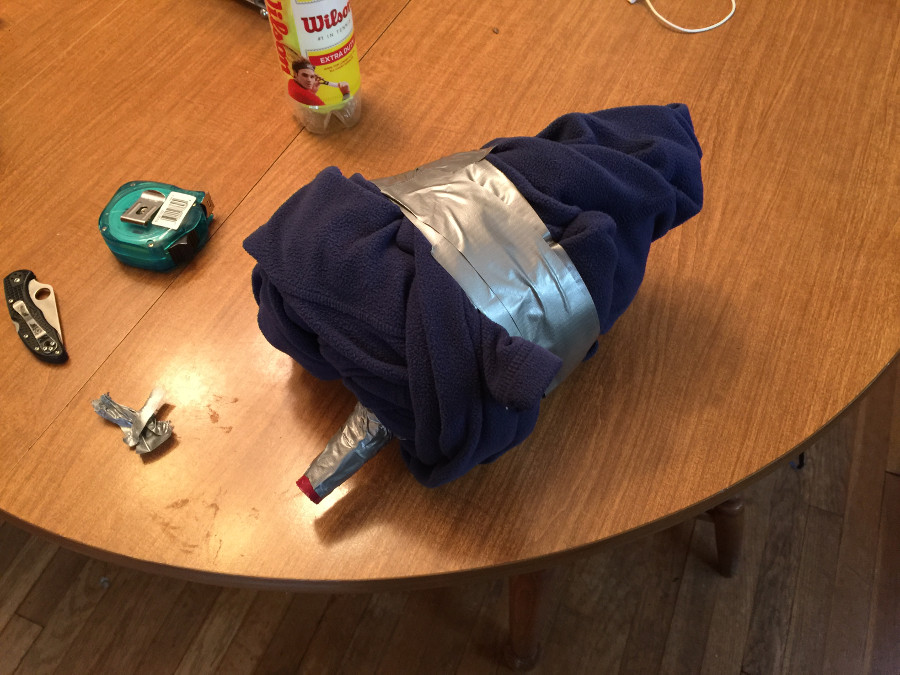
- Wrap the sweatshirt around the top of the mop.
- Begin to shape the head, make sure you build a chin, we’ll need that for practicing chokes!
- I put a couple of pieces of duct tape under the chin to secure it’s shape before finishing the head. I also taped the sweatshirt to the handle (as seen below). I didn’t wrap much of the sweatshirt around the handle, just a little of the sweatshirt near where the handle meets the mop, and then used the duct tape to continue the wrap down the length of the handle.
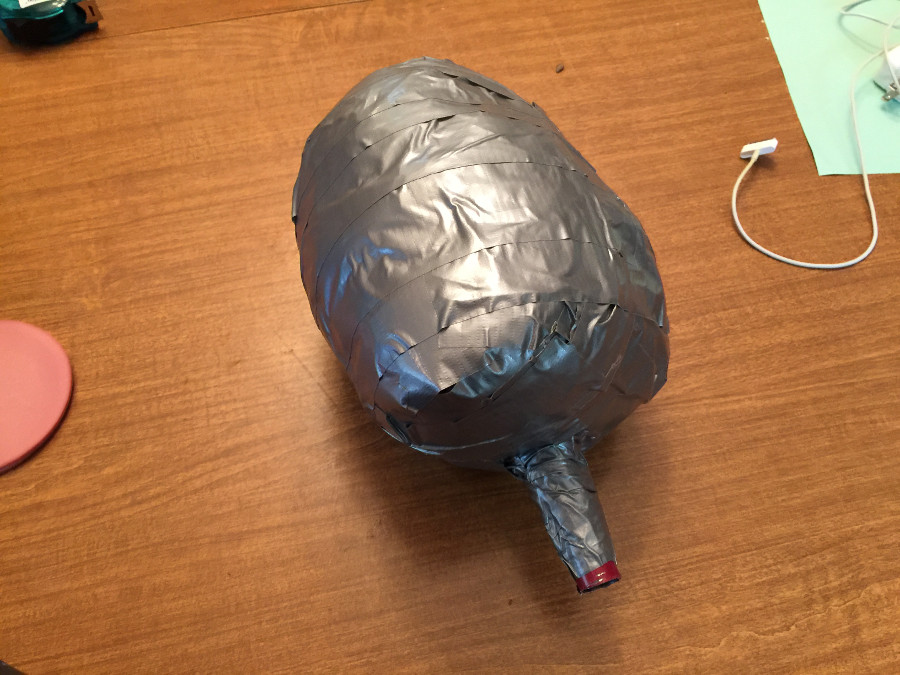
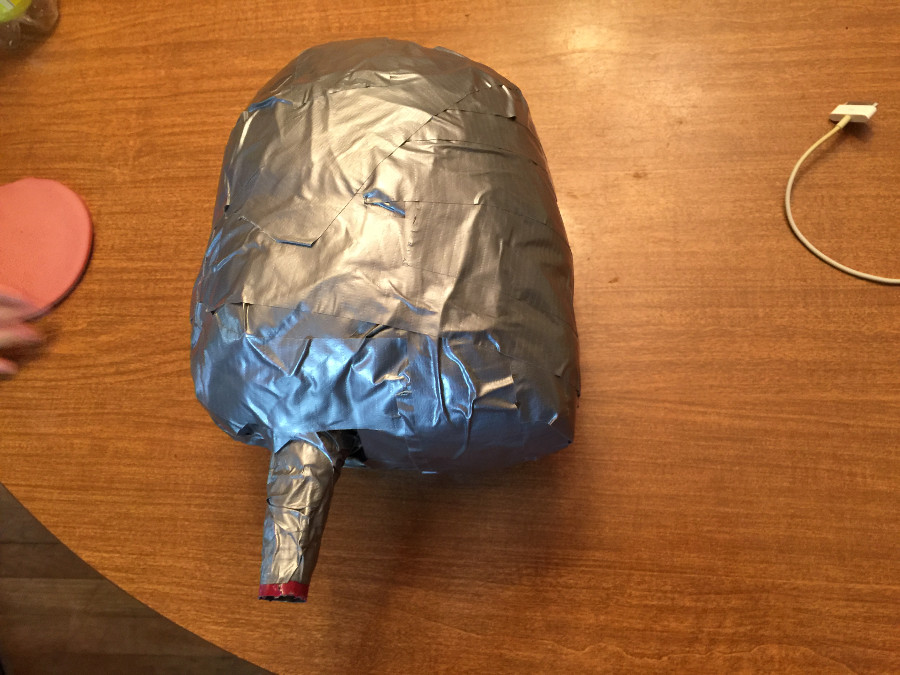
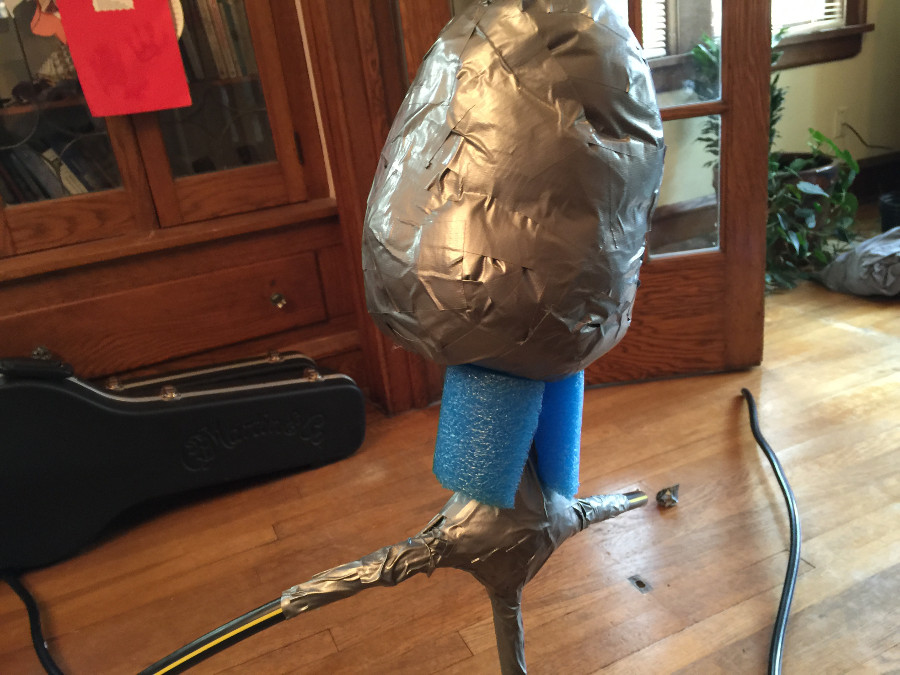
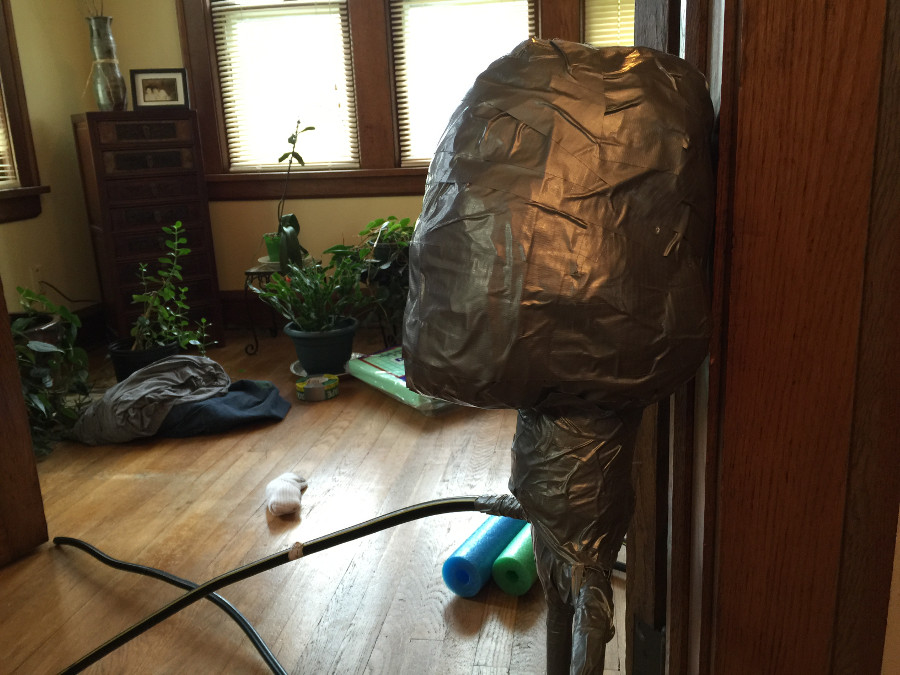
- Here are some pics of the how the head turned out, and how it was shaped.
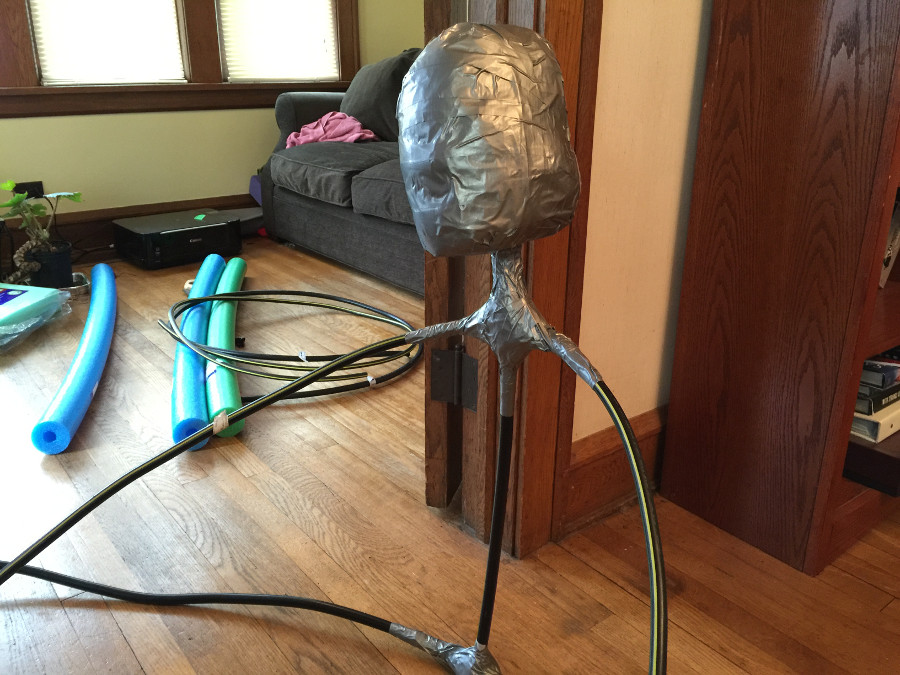
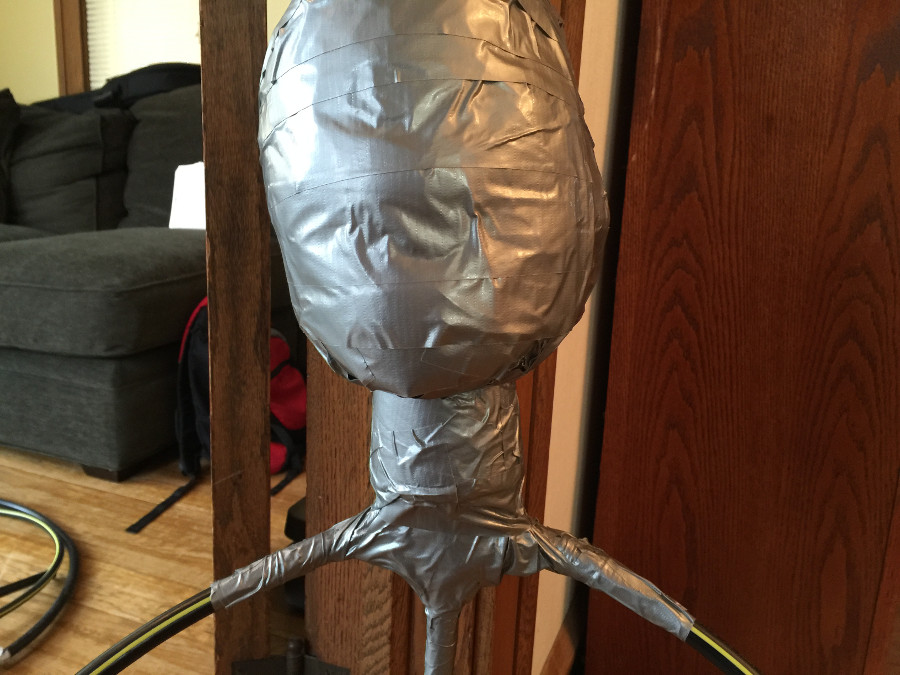
- Now we’ll attach the head to the torso by simply sliding the head over the top of the service cable wire, and taping it to the torso.
I used an x-pattern here as well, starting the tape on one side of the neck, wrapping it down and under the opposite side “armpit”. I did this in both directions (left to right and right to left) as well as turning the frame around and doing both directions from the back as well. Again, copious amounts of duct tape was used, I didn’t want this coming apart.
- To beef up the neck I cut a piece of pool noodle approximately 2-1/2 to 3 inches long, and sliced it lengthwise on one side so I could fit it around the frame of the neck.
- Tape the neck with duct tape.
- At this point we’re ready to start making the torso. We’ll need the 2 sheets of high density foam, a little bit of the pool noodles, and the two bedsheets for this section. Begin by cutting 4 pieces of pool noodle, each approximately 6 inches long. These will be used for the shoulders and hips. Lay one of the sheets of high density foam on the ground under the torso frame, and slide the pool noodle pieces over the legs and arms until they meet the torso.
- To give the torso more girth place one bed sheet on one side of the frame, and another on the other side of the frame, over the bottom sheet of foam.
- Place the second piece of foam over the torso and duct tape it together. IMPORTANT: Make sure you center the torso and neck so that the grappling dummy is not lopsided.
- At this stage we’ll start taping the shoulders and hips to the torso. When I did this I realized I needed a little more padding between the hips and the torso, so I cut 2 more pieces of pool noodle about 4 inches in length and placed them between the hips and the torso. I then taped it all together, again, with lots of duct tape so it doesn’t come apart. (You can see I started to shape the frame of the legs too).
- We’ll use tennis ball halves to simulate the knees and elbows. I used a Spyderco Delica Combination Edge to split the tennis balls.
- We’ll need to measure our arms and legs to know where bend the frame and add the knees and elbows. To do this I measured the length of my quad and shin, as well as my upper and lower arm to know what size to cut the pool noodles. I left out 2 inches in the measurement to account for the knees and elbows. For the legs I used 2 15 inch lengths of pool noodle and for the arms I used 2 pieces about 11 inches long (NOTE: These measurements may change depending on how large you want your dummy to be. You can measure your own arms to get an estimate). I then slid these pieces over the frame of the arms and legs, and attached the knees and elbows where the belonged. I then wrapped all that in duct tape, making sure to pay special attention to how the duct tape was layered where the pieces of pool noodle attached to the frame.
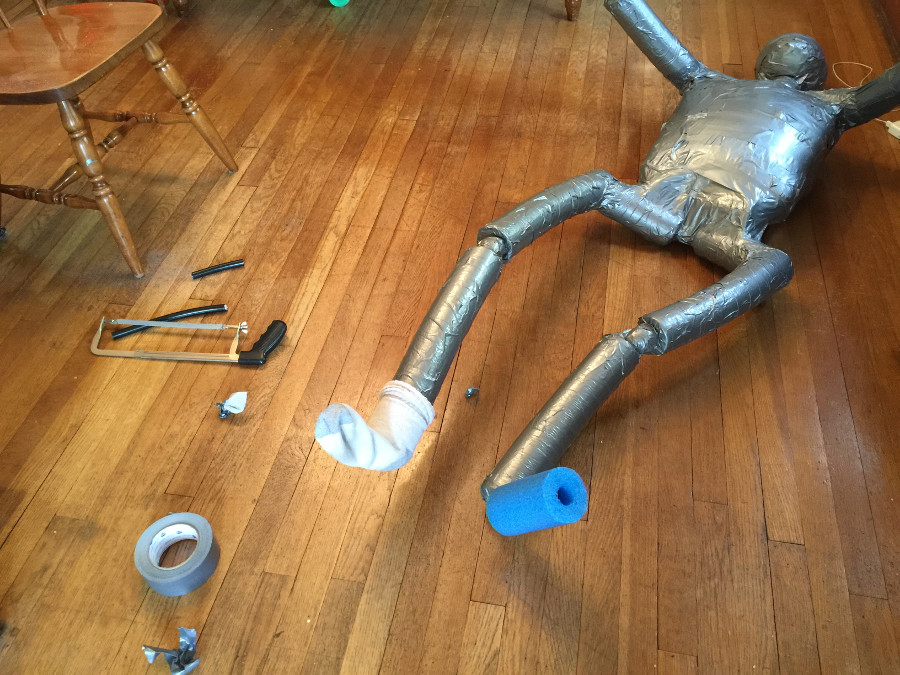
Tape legs:
Attach pool noodles as arms:
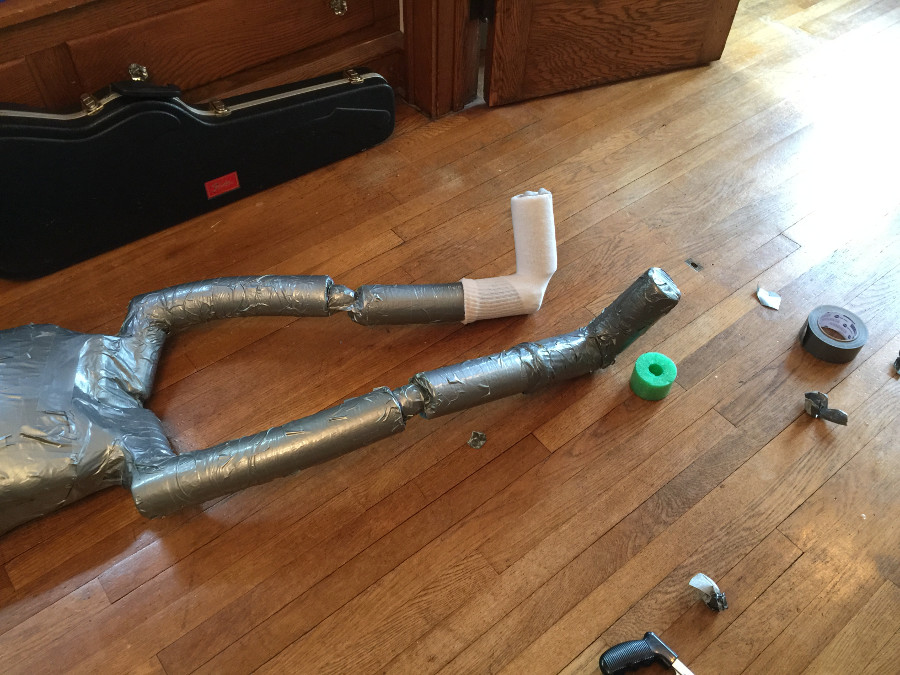
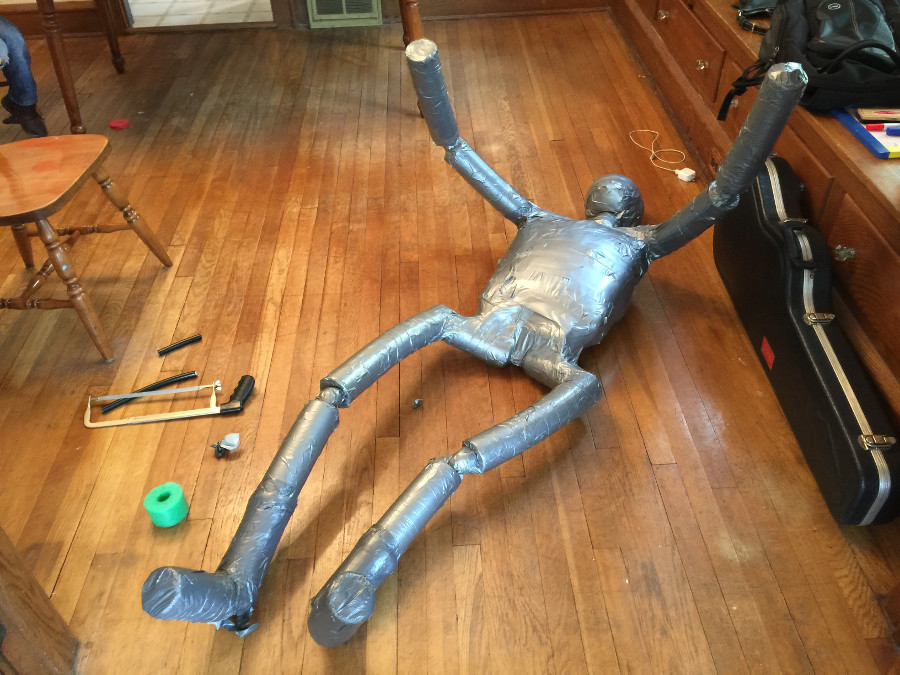
- Next we make the feet, using portions of the pool noodles. I cut 2 9 inch pieces of pool noodle for the feet and slid them on the frame. I then cut the excess frame so that it was flush with the end of the pool noodle. I put sockes over the feet and taped the sock with duct tape. At this point I also cut the excess frame from end of the arms and finished duct tapping those.
- And that’s all there is to it, when it’s finished you’ll have something that looks like this:It can sit upright on it’s own!
- Start with the right supplies (listed above)
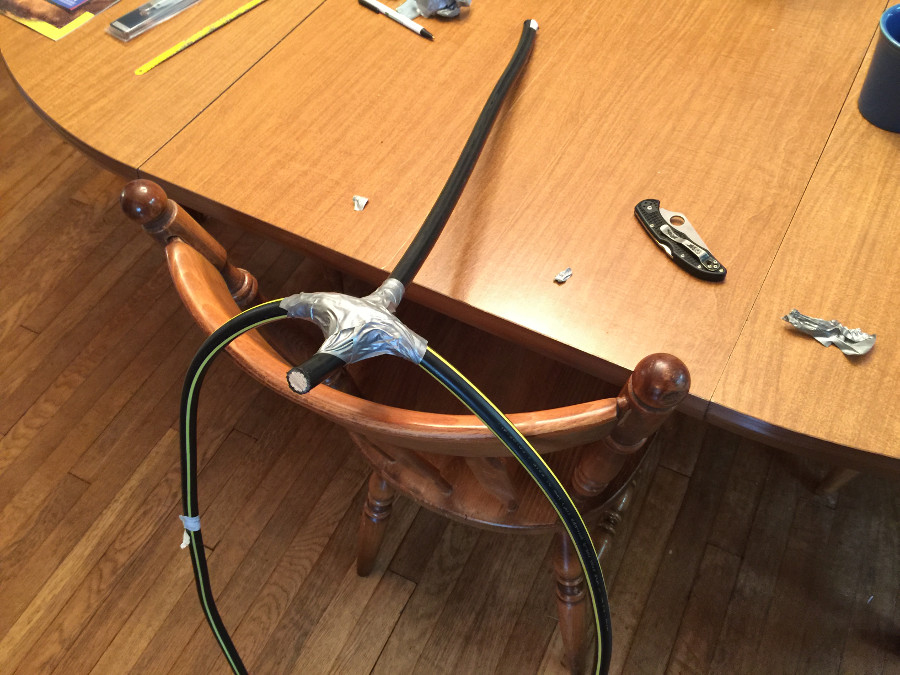 Here we can see the arms are finished being attached to the torso.
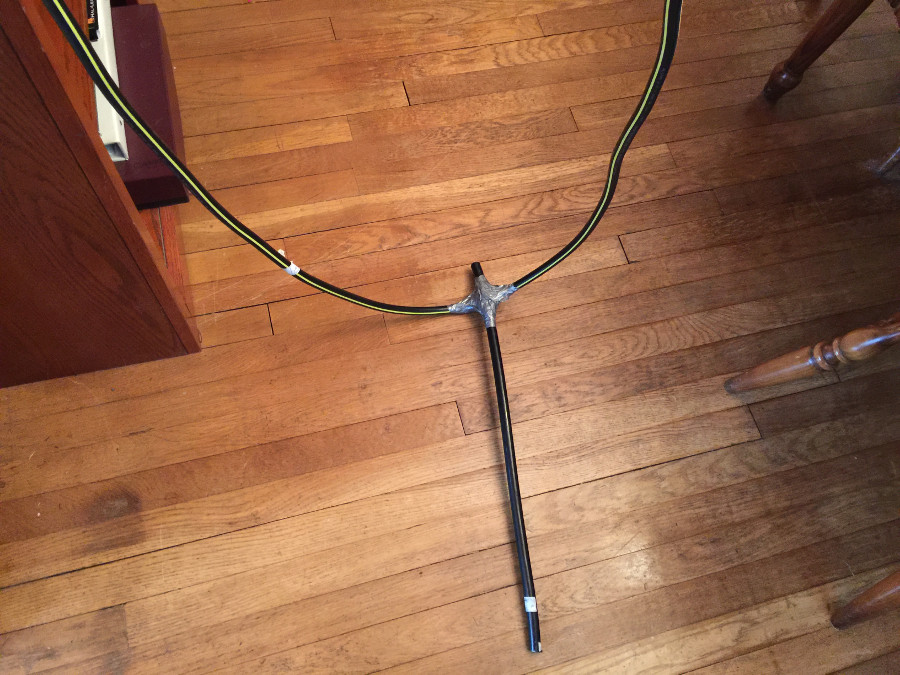
 Use a liberal amount of duct tape and the same x-pattern that was used with making the arms to secure the legs to the torso.
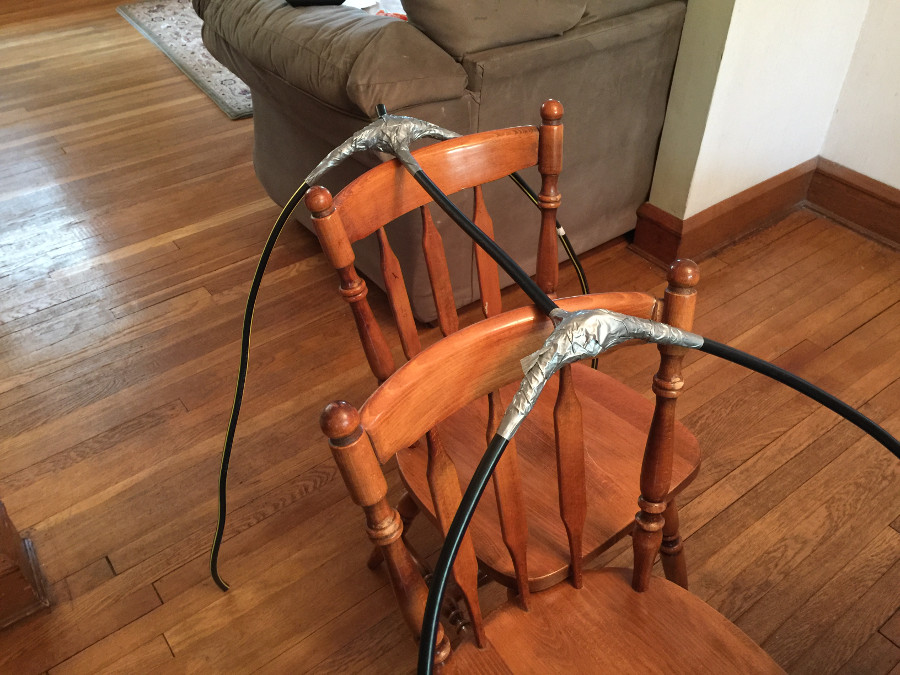


 Tape legs:
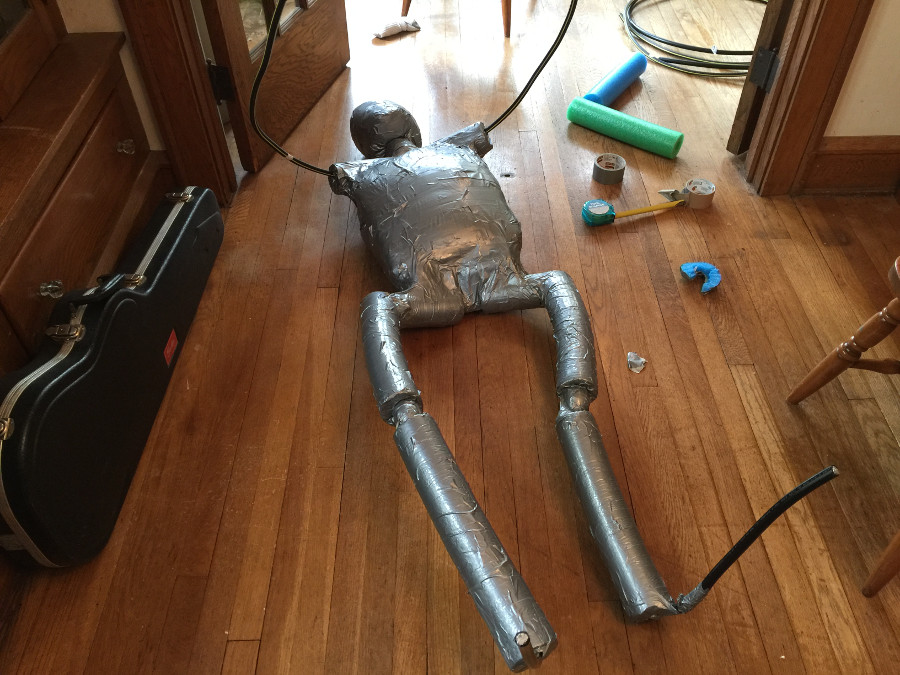 Attach pool noodles as arms:
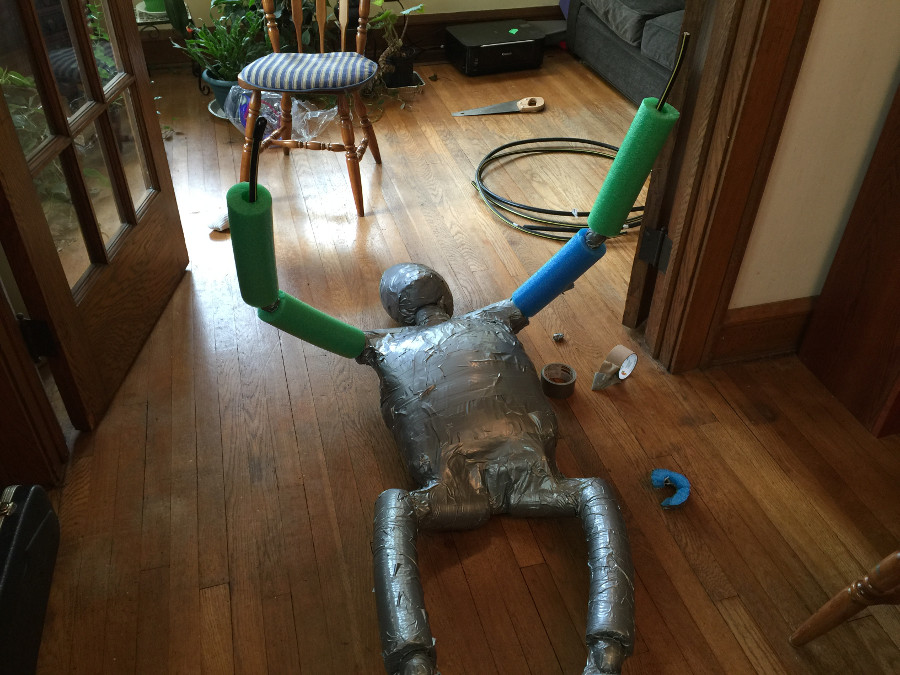
 It can sit upright on it’s own!
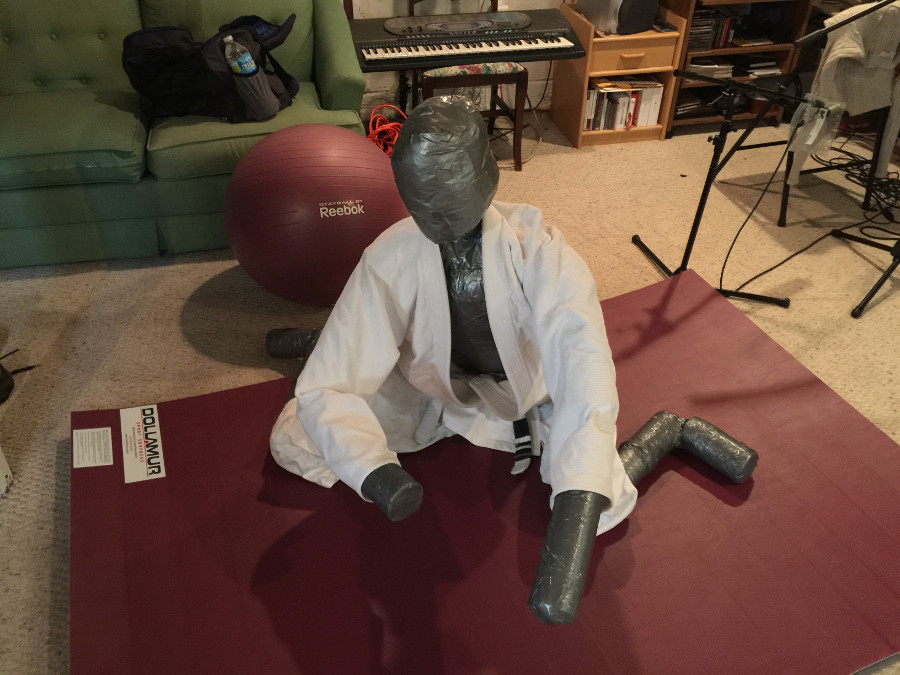
The great thing about this design is that the service cable is strong enough to stand up to abuse, while flexible enough that you can bend the dummy into positions that you need in order to practice your moves. The pool noodles are a cheap and easy way to add bulk to the arms and legs as well. Down the road I may add a little more build to the thighs of the legs but for now it seems to be working out ok. I’m able to practice triangles, armbars, omoplatas, and even some take downs with this design. If I think of any improvements I’ll be sure to post them. If you think of and want to share them you can comment below.
Check out the video at https://www.youtube.com/watch?v=X0kyNUEMZbo for more details.
If you’re unsure whether you want to build a grappling dummy or buy one, I wrote up a grappling dummy buyer’s guide that may help you.
Hey! My dummy is not cutting it and i need to do something. Thanks for this.
How much does this weigh when finished?
Glad this post helped! The dummy weighs about 20lbs.
Do you think with this setup you’d be able to make this a free standing dummy to practice takedowns?
I tried to use this for takedowns, it didn’t really work that well. So I’m not sure if this particular design could be used effectively for takedowns.
Well explained we appreciate your effort!